Documentation Index
Fetch the complete documentation index at: https://private-04b27de1.mintlify.app/llms.txt
Use this file to discover all available pages before exploring further.

Mark Sze
Software Engineer at AG2.ai

Tvrtko Sternak
Machine Learning Engineer at Airt

Davor Runje
CTO at Airt
TL;DR
- Learn how to build an agent chat application using WebSockets and
IOStream - Explore a hands-on example of connecting a web application to a responsive chat with agents over WebSockets.
- Streamlined Real-Time Interactions: WebSockets offer a low-latency, persistent connection for sending and receiving data in real time.
Real-Time Applications: Why WebSockets?
WebSockets provide a powerful framework for real-time communication between a client and server. Unlike traditional HTTP requests, which require polling for updates, WebSockets establish a persistent, full-duplex connection that allows for continuous data exchange. This capability is critical for applications that use AG2, where seamless interaction is essential.Key Benefits of WebSockets
- Low Latency: WebSockets reduce latency by maintaining a direct, open connection, avoiding the overhead of repeated HTTP handshakes.
- Efficient Data Streaming: Continuous, two-way data streams enable smooth user experiences in real-time applications.
- Event-Driven Communication: With WebSocket protocols, the server can “push” updates to the client as events occur.
- Simplified Architecture: WebSockets eliminate the need for separate polling mechanisms, reducing server load and complexity.
Building a chat System
This example demonstrates how to create a WebSocket-based chat system that streams real-time input and output from AG2 Agents.How It Works
- WebSocket Connection: The client establishes a persistent WebSocket connection to the server.
- Real-Time Data Flow: Events in the conversation are streamed over WebSockets to the browser where they can be displayed.
Example: Creating a Weather chat app
Let’s walk through an example that integrates WebSockets with a weather-focused chat.You can explore the full example code here.
1. Clone the Repository
2. Set Up Environment Variables
Create aOAI_CONFIG_LIST file based on the provided OAI_CONFIG_LIST_sample:
api_key to your OpenAI API key.
(Optional) Create and use a virtual environment
To reduce cluttering your global Python environment on your machine, you can create a virtual environment. On your command line, enter:3. Install Dependencies
Install the required Python packages usingpip:
4. Start the Server
Run themain.py file:
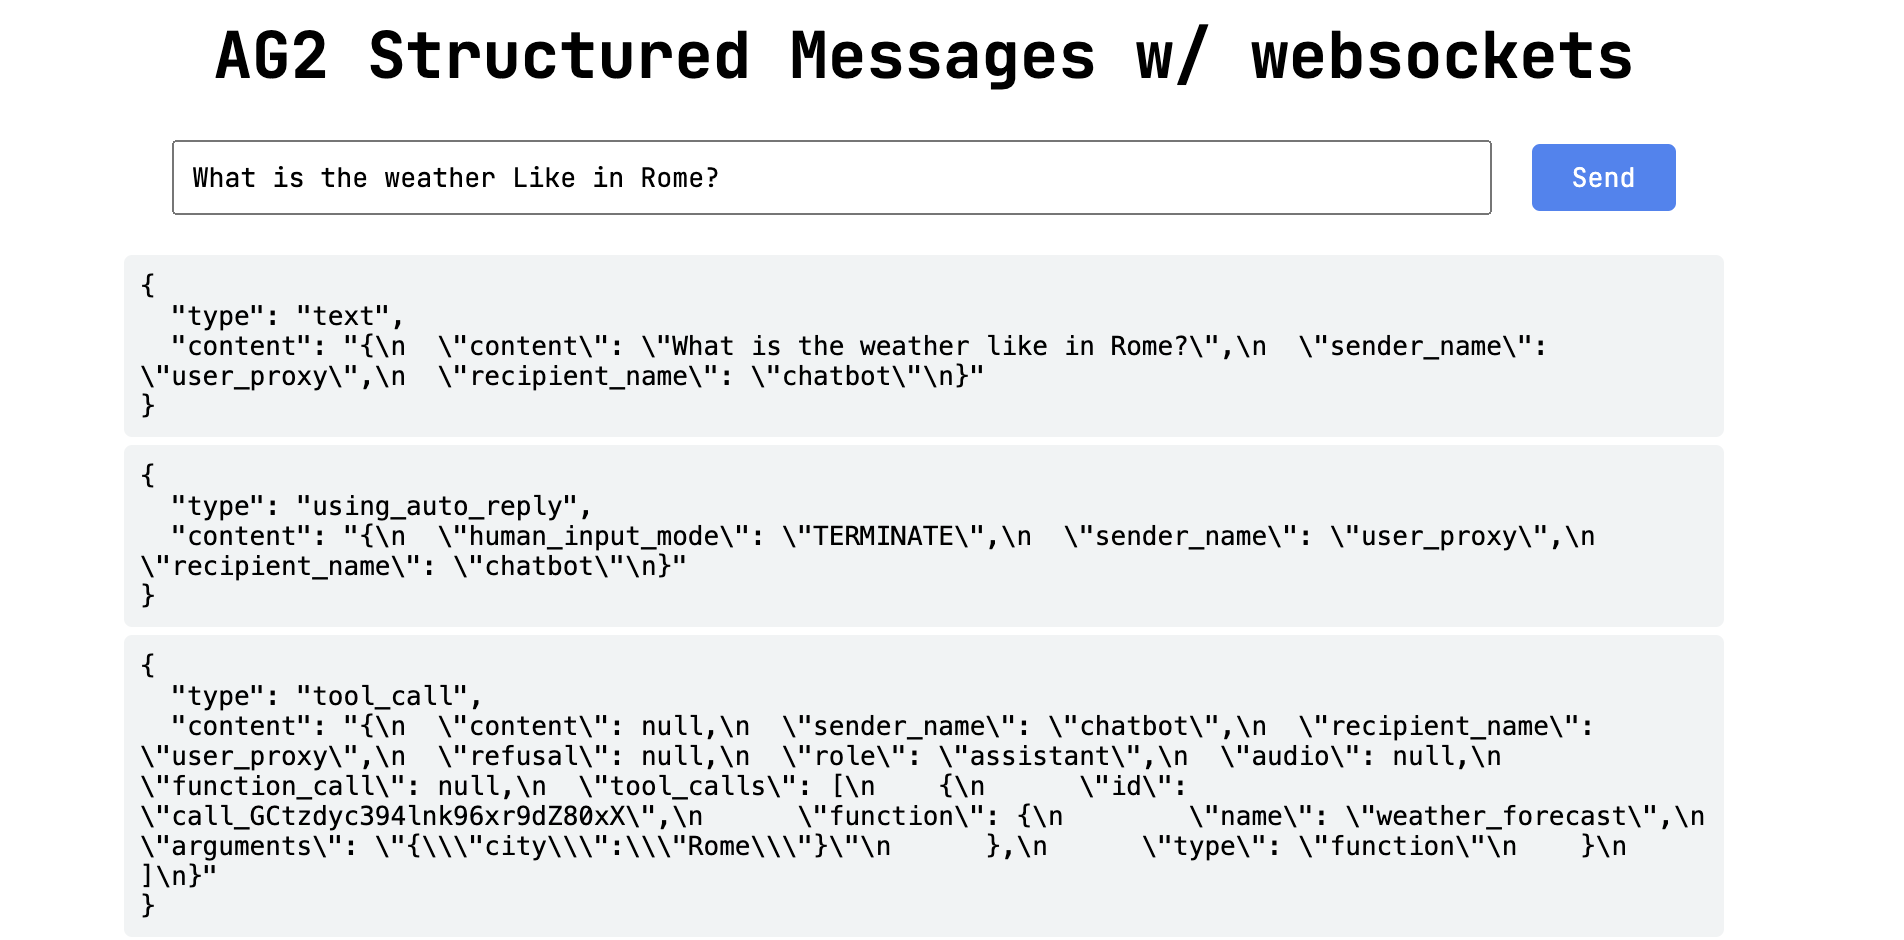
Test the App
With the server running, open the client application in your browser by navigating to http://localhost:8001/. And send a message to the chat and watch the conversation between agents roll out in your browser.Code review
Backend Code: main.py
The backend is responsible for serving the frontend, managing WebSocket connections, and hosting the AI-powered conversational agent. Below is a step-by-step breakdown.
Setting Up the WebSocket Server
TheIOWebsockets.run_server_in_thread utility is used to run a WebSocket server. The on_connect function handles new client connections and initializes the chatbot.
on_connect: Handles client connections and manages the interaction between theConversableAgentand the client.- Tool Registration: The
weather_forecastfunction provides a mock weather report and is linked to the agent for handling weather-related queries.
Serving the Frontend
TheSimpleHTTPRequestHandler is used to serve HTML files. A custom handler class overrides the behavior for the root path to serve chat.html.
- The
MyRequestHandlerclass ensures that the default page served ischat.html. - Files are served from the
website_files/templatesdirectory.
Running the Servers
Finally, both the WebSocket and HTTP servers are started.- The WebSocket server listens on port
8080, while the HTTP server listens on port8001. - The WebSocket server handles real-time communication, while the HTTP server serves static files.
Frontend Code: chat.html
The frontend provides a simple interface for users to interact with the chatbot.
HTML Structure
The HTML structure defines an input form for sending messages and a list for displaying them.JavaScript Logic
The JavaScript code establishes a WebSocket connection, handles incoming messages, and sends user input to the backend.- WebSocket Initialization: Connects to the WebSocket server at
ws://localhost:8080. - Message Display: Appends incoming messages to the
#messageslist. - Sending Messages: Captures user input, sends it to the server, and clears the input field.